
Desserts
This chewy chocolate oatmeal cookies recipe delivers the perfect balance of tender crumb, crispy oat edges, and rich chocolate pockets—every bite is a warm, spiced hug. 💛 The secret lies in browned butter and a touch of cinnamon that deepens the flavor while keeping the texture irresistibly chewy. I've tested this recipe dozens of times, adjusting for the ideal ratio of oats to dough and chocolate chunks that stay melty in the center.
What sets these apart is the 30-minute chilling time before baking, which prevents spreading while developing maximum flavor. The rolled oats add delightful crunch without overpowering the soft centers, and dark chocolate chunks melt into gooey rivers when cut.
This recipe is foolproof for beginners but delivers restaurant-quality results that even experienced bakers will appreciate.
By the time they emerge from the oven, you'll have cookies with golden edges, a tender interior, and pockets of molten chocolate that make them impossible to resist.
The warm spices linger on your tongue long after the last bite, making these perfect for holiday gifting, potlucks, or satisfying that afternoon sweet tooth. They stay fresh for days, too—if they last that long.
For extra indulgence, fold in chopped walnuts or a sprinkle of flaky sea salt before baking. The variations are endless, but the core recipe remains simple: just 10 ingredients and 20 minutes of active time. Let's get baking—your kitchen will smell like holiday magic in no time.
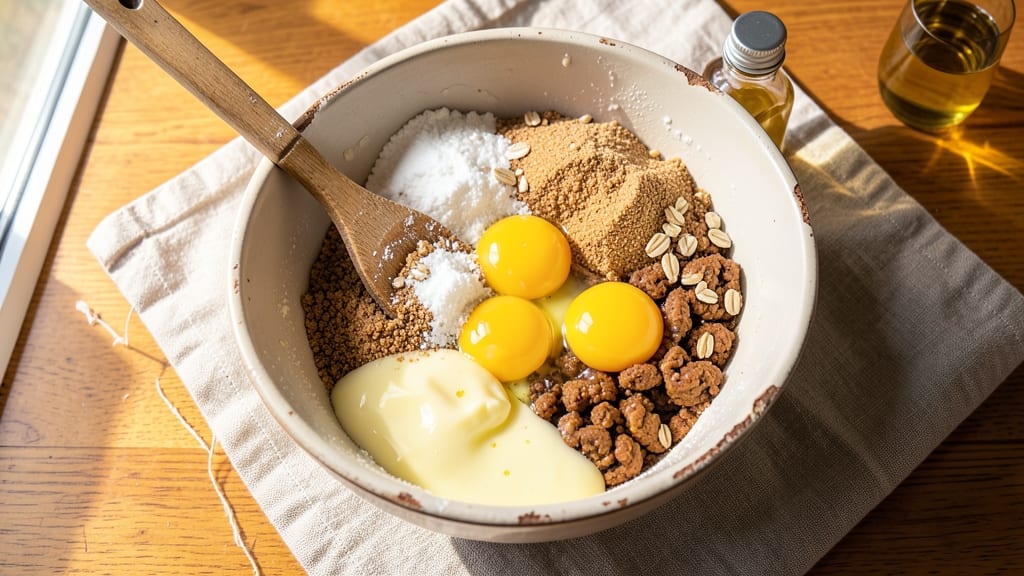
Ingredients for chewy chocolate oatmeal cookies
Ten simple ingredients transform into chewy cookies with crisp oat edges and molten chocolate pockets.
| Ingredient | Amount | Notes |
|---|---|---|
| Unsalted Butter 🧈 | 1 cup | Browned for nutty depth |
| Packed Brown Sugar 🍯 | 1 cup | Light or dark preferred |
| Granulated Sugar 🍚 | ½ cup | For balanced sweetness |
| Large Eggs 🥚 | 2 whole | Room temperature for blending |
| Vanilla Extract 🌿 | 2 tsp | Pure extract preferred |
| All-Purpose Flour 🌾 | 2 ½ cups | Sifted for light texture |
| Baking Soda 🧂 | 1 tsp | For leavening action |
| Ground Cinnamon 🌶️ | 1 ½ tsp | Warm spice essential |
| Kosher Salt 🧂 | ½ tsp | Diamond Crystal preferred |
| Rolled Oats 🌾 | 3 cups | Old-fashioned, not quick |
| Dark Chocolate Chunks 🍫 | 1 ½ cups | 70% cocoa preferred |
The butter deserves special attention—browning it develops rich, nutty flavors that elevate everything. European-style unsalted butter like Plugrá or President gives the best results, but any quality brand works. For the chocolate, 70% cocoa chunks from Valrhona or Lindt melt beautifully, but high-quality grocery store brands like Ghirardelli work too. The oats should be old-fashioned, not quick-cooking—they add that perfect crunch without turning to mush. Measure your flour by weight if possible (2.5 cups = ~300g), as scooping can lead to dry cookies. For the spices, Penzeys or Spicewalla cinnamon adds depth, but grocery store brands are fine for everyday baking.
No brown sugar? Substitute equal parts light and dark muscovado sugar for deeper molasses notes. Short on vanilla? Vanilla bean paste or bourbon extract adds complexity. The chocolate chunks can be swapped for chopped nuts like walnuts or pecans if preferred. For a gluten-free version, use a 1:1 flour blend like Bob's Red Mill, but expect slightly denser cookies. If you're making these ahead, fold in the chocolate chunks just before baking to prevent them from melting prematurely in the dough.
Store cookies in an airtight container at room temperature for up to 5 days—they'll stay chewy, not stale. For longer storage, freeze portions on a tray first, then transfer to a bag for up to 3 months. Reheat in a 300°F oven for 3-5 minutes to revive the soft centers. These freeze beautifully, making them perfect for holiday gifting. The dough can also be chilled for up to 48 hours for even deeper flavor development—just let it sit at room temperature for 30 minutes before baking.
Why You'll Love This Recipe
- No Mixer Needed: The dough comes together with just a fork—no stand mixer, no food processor, just you and your hands. Brown sugar and butter create that perfect chewy texture while you’re at it, so you’re not just mixing, you’re building something delicious.
- Rich Without Overpowering: That balance of brown sugar and granulated sugar gives them a deep caramel sweetness, but the vanilla and eggs keep it from being cloying. Honestly, the first bite makes me wonder why I ever bought store-bought cookies—these taste like a hug from a bakery.
- Double-Duty Cookies: They’re great for holidays, but I also keep a batch in the freezer for lazy mornings or after-school snacks. Toss a few in a lunchbox, or bake a fresh tray when company drops by—no one will guess they’re this easy to make.
- Budget-Friendly Indulgence: You’re using pantry staples here—eggs, butter, sugar—so the cost per cookie is laughably low. I’ll be real: my grocery budget thanks me every time I make these instead of buying overpriced bakery treats. Plus, they stay fresh for days.
Step-by-step instructions for chewy chocolate oatmeal cookies
Here's the method that delivers perfectly chewy cookies with crunchy oat bits and rich chocolate pockets.
🍳 Step 1: Brown the Butter for Nutty Depth
Melt the 1 cup unsalted butter in a light-colored saucepan over medium-low heat. Watch closely as it foams and bubbles—this is when the milk solids begin to brown. When the butter develops a golden color and smells nutty (about 5-7 minutes), immediately pour it through a fine-mesh strainer into a heatproof bowl to remove the browned solids. Let it cool to room temperature before using.
This browning step transforms ordinary butter into something extraordinary—adding complex, caramelized notes that elevate the entire cookie. Don't rush this process; patience here prevents burnt butter. The cooled butter should be smooth and slightly thickened from the browning process.
👨🍳 Step 2: Cream Butter and Sugars to Fluffy Perfection
In a stand mixer fitted with the paddle attachment, beat the browned butter with 1 cup packed brown sugar and 0.5 cup granulated sugar on medium speed for 3-4 minutes. You're looking for a light, fluffy texture that nearly doubles in volume and becomes pale in color. Scrape down the sides of the bowl with a rubber spatula to ensure even mixing.
The reason we wait until the mixture is fully creamed is to incorporate maximum air—this creates those beautiful crackly tops and ensures a tender, chewy interior. If you rush this step, your cookies will be dense rather than chewy. The mixture should be smooth with no visible sugar crystals remaining.
👨🍳 Step 3: Add Eggs and Aromatics
Add the 2 whole large eggs one at a time, mixing on low speed for 30 seconds after each addition until fully incorporated. Then add the 2 teaspoons vanilla extract and mix for another 10 seconds. The mixture might look slightly curdled at this point, but don't worry—this will resolve when we add the dry ingredients.
Here's the thing—using room temperature eggs prevents lumps and blends more smoothly into the butter mixture. If your eggs are cold, warm them in a bowl of hot water for 5 minutes before adding. The vanilla extract should be pure, not imitation, for the best flavor profile in these spiced cookies.
🥘 Step 4: Combine Dry Ingredients and Oats
In a separate bowl, whisk together the 2.5 cups all-purpose flour, 1 teaspoon baking soda, 1.5 teaspoons ground cinnamon, and 0.5 teaspoon kosher salt. Then add the 3 cups rolled oats and mix until evenly distributed. Gradually add this dry mixture to the wet ingredients, mixing on low speed for 30-45 seconds until just combined—you should still see a few flour streaks.
Over-mixing develops gluten and makes cookies tough, so be gentle here. The dough should be thick and slightly sticky but manageable. Fold in the 1.5 cups dark chocolate chunks by hand using a silicone spatula, making sure they're evenly distributed throughout the dough. If it seems too sticky, chill for 10 minutes before proceeding.
⏰ Step 5: Chill and Bake for Perfect Texture
Cover the dough with plastic wrap and refrigerate for at least 1 hour (I prefer 2 hours or even overnight). This chilling step is crucial—it solidifies the butter, prevents excessive spreading, and allows the flour to fully hydrate for better texture. The cold dough also means the cookies hold their shape better when they hit the hot oven.
Preheat your oven to 350°F and line two baking sheets with parchment paper. Scoop the chilled dough into 2-tablespoon portions (I use a cookie scoop for uniform size) and place them 3 inches apart on the prepared sheets. Bake for 11-13 minutes until the edges are golden brown but the centers still look slightly underdone—this ensures they remain chewy inside.
Pro Tips For Making Chewy Chocolate Oatmeal Cookies
- Chill the Dough: After mixing everything, pop the dough in the fridge for at least 30 minutes—yes, even if you’re eager to bake. I used to skip this and ended up with flat, cakey cookies. Cold dough holds its shape better and develops deeper flavor as it bakes.
- Cream Butter Slowly: Beat the butter and sugars on medium speed until light and fluffy—about 2-3 minutes. Going too fast just heats the butter, and you’ll end up with greasy cookies instead of chewy ones. Patience here makes all the difference.
- Underbake Slightly: Pull the cookies when the edges are golden but the centers still look soft—about 8-10 minutes total. They’ll firm up as they cool. Overbaking turns them dry; trust your nose more than the color.
- Use Old-School Oats: Toast your oats in a dry pan for 5-7 minutes until fragrant—it deepens their flavor and prevents a raw taste. (Skip this if you’re in a rush, but your cookies will taste noticeably better when you don’t.)
Regional styles of this chewy chocolate oatmeal cookies
Classic American Style
The original version of these chewy oatmeal cookies comes from classic American baking traditions, where brown sugar and cinnamon create that signature warm spice profile. I remember my grandmother's kitchen always smelled like these during holiday baking—she used 1 cup brown sugar and 1.5 tsp cinnamon for that perfect balance.
The rolled oats add texture without overpowering the chocolate, making them a staple in American cookie jars. 🌶️
Southern Comfort Twist
In the Southern United States, these cookies often get a richer twist with peanut butter swirls or a sprinkle of coarse sea salt on top. I love adding ½ cup creamy peanut butter to the dough and swirling it in with a knife before baking—it creates beautiful marbled patterns.
The salt enhances the sweetness while adding a sophisticated touch that makes them feel like a bakery treat.
New England Crunch
Up north in New England, the focus shifts to extra crunch with toasted oats and chopped walnuts.
I like toasting 2 cups of the rolled oats in a dry skillet over medium heat for 5 minutes until golden, then mixing them into the dough along with 1 cup chopped walnuts.
This version has a delightful nutty crunch that pairs perfectly with the chewy centers, making it a favorite for fall gatherings.
Midwest Homestyle
The Midwest version often includes molasses for deeper flavor and a touch of gingersnap crumbles mixed into the dough. I add 2 tablespoons molasses along with the vanilla and fold in ½ cup crushed gingersnaps for extra texture.
This variation has a more complex flavor profile that makes it feel like a cozy hug in cookie form—perfect for cold winter days.
Pacific Northwest Adaptation
On the West Coast, especially in Oregon and Washington, you'll find versions with local honey instead of some of the brown sugar and dark chocolate chunks from regional chocolatiers.
I substitute ½ cup honey for ½ cup brown sugar and use 72% cocoa chunks from local artisan chocolatiers** like Taza Chocolate. This creates a more sophisticated flavor profile with natural sweetness and rich chocolate notes that reflect the Pacific Northwest's love of artisanal ingredients. 🌟
Nutrition facts
Frequently asked questions
Why do these cookies need to chill before baking?
The 30-minute to 2-hour chill is key for two reasons: it prevents spreading (so they hold their shape) and lets the flour absorb moisture for a chewier texture. Cold butter also creates steam in the oven, keeping centers soft while edges crisp. Skipping this step often results in flat, cakey cookies instead of the perfect chewy texture.
Can I use quick oats instead of rolled oats?
Never! Quick oats are steamed and cut too fine, turning to mush instead of adding that delightful crunch. Rolled oats (old-fashioned) have that perfect toasty bite. If you're out of rolled oats, toast quick oats in a dry skillet for 5 minutes until golden—it helps, but they won't be as crunchy.
How do I fix cookies that spread too much?
Next time, chill the dough longer (2+ hours) and use a cookie scoop for uniform balls. For already-baked flat cookies, try this: brush with melted butter, sprinkle with powdered sugar, and bake at 350°F for 5-7 minutes to puff them up slightly. The key is colder dough—room temp butter spreads like crazy!
What's the best way to store these cookies?
Keep them in an airtight container at room temp for 5 days—they'll stay chewy, not stale. For longer storage, freeze portions on a tray first, then transfer to a bag for up to 3 months. To revive, warm in a 300°F oven for 3-5 minutes until soft again. The chocolate stays melty when properly stored!
Can I make these gluten-free?
Yes! Swap the all-purpose flour for a 1:1 gluten-free blend (like Bob's Red Mill) and add ½ tsp xanthan gum if your blend doesn't include it. Expect slightly denser cookies—they'll still be delicious but may lack the classic chew. For texture, try certified gluten-free oats to avoid gritty bits.