
Desserts
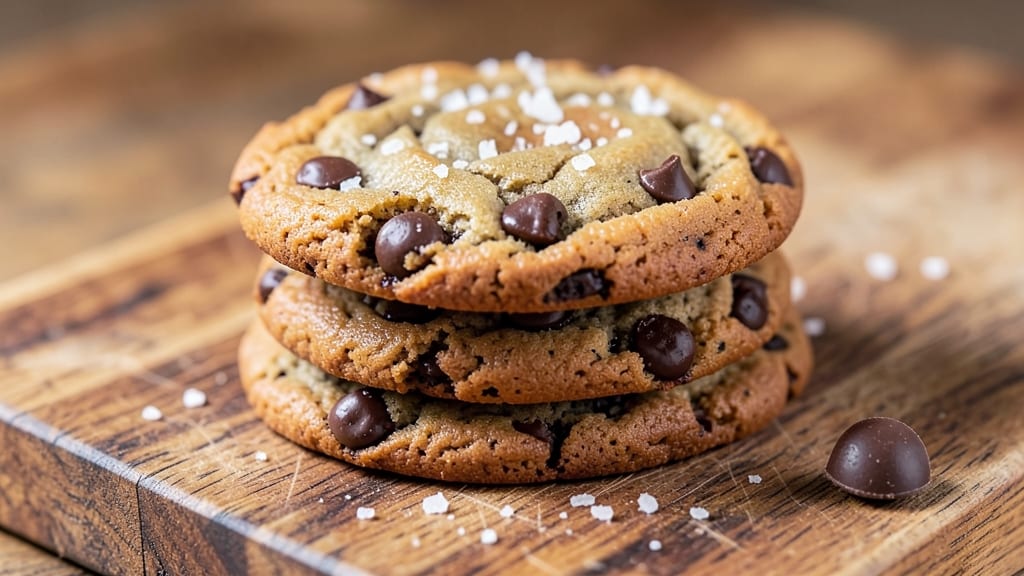
This chewy chocolate chip cookie recipe without baking soda delivers restaurant-quality texture and flavor using brown butter and a clever substitution. The secret lies in brown sugar and baking powder working together to create that signature chew without the traditional leavening agent.
I've perfected this version after years of testing, and it's become my go-to for cookies that stay soft at the center with crisp edges.
The brown butter adds a rich, nutty depth that transforms ordinary chocolate chip cookies into something extraordinary. Instead of baking soda, we rely on baking powder for lift and cornstarch for that signature chewy texture.
This method creates cookies that are tender yet sturdy enough to hold their shape while still warm from the oven.
By the time you pull these golden-brown cookies from the oven, you'll have a batch that's dangerously chewy with pools of melted chocolate in every bite. The aroma alone will have everyone gathering in the kitchen, and the flavor is so rich it'll satisfy even the most demanding cookie lovers.
These cookies stay fresh for days, making them perfect for baking ahead and storing in an airtight container. Whether you're serving them warm with a glass of milk or packing them up for a holiday gift, this recipe delivers professional-quality results every time.
Ingredients for chewy chocolate chip cookie recipe without baking soda
Brown butter, brown sugar, and a clever baking powder trick make these cookies legendary.
| Ingredient | Amount | Notes |
|---|---|---|
| Unsalted Butter 🧈 | 1 cup | Browned for nutty flavor |
| Granulated Sugar 🍚 | ½ cup | For crisp edges |
| Light Brown Sugar 🍚 | 1 cup | Packed for chewiness |
| Large Eggs 🥚 | 2 whole | Room temperature preferred |
| Vanilla Extract 🌿 | 2 tsp | Pure vanilla preferred |
| All-Purpose Flour 🌾 | 2 ½ cups | Sifted for even texture |
| Cornstarch 🌾 | 2 tbsp | For signature chew |
| Baking Powder 🧂 | 1 tsp | Aluminum-free preferred |
| Salt 🧂 | 1 tsp | Fine sea salt |
| Chocolate Chips 🍫 | 2 cups | Semi-sweet preferred |
| Flaky Sea Salt 🧂 | 1 tbsp | For finishing |
The butter is non-negotiable here—brown it yourself (cook on low heat until nutty and golden). Land O'Lakes unsalted or Plugrá work best for browning. Brown sugar should be packed tight—use a spoon to press it down in the measuring cup. Vanilla extract? Pure Madagascar bourbon is my go-to, but imitation works in a pinch. Flour gets sifted with the cornstarch and baking powder—King Arthur is my favorite for this recipe. The chocolate chips? Ghirardelli semi-sweet melts perfectly, but any good brand will do.
No brown butter? Regular butter plus 1 tbsp brown sugar per cup mimics the flavor (not the texture, but close). Short on vanilla? Vanilla bean paste at half the amount adds flecks. The cornstarch is key for chew—arrowroot powder works too. Baking powder must be fresh (test by mixing with water—it should bubble). For chocolate, white chocolate chips can replace half the semi-sweet if you like contrast. Pre-shredded chocolate? Don't even think about it—chop your own bars for perfect melt.
Brown butter smells amazing but loses potency fast—use it immediately or store in the fridge for 1 week. The dough keeps 3 days wrapped in plastic. Baked cookies stay fresh 5 days in an airtight container, or freeze for 3 months. Reheat in a 350°F oven for 5 minutes to revive that fresh-from-oven magic. I always bake a double batch—they disappear too fast.
Why You'll Love This Recipe
- Here’s what sold me: bake a batch, cool them, and freeze in a bag. Pull one out for a hot cup of coffee anytime—no thawing needed. My kids grab them straight from the freezer, and they’re still perfect.
- No-Fuss Mixing: I swear by the creamy butter-sugar combo—just cream, fold, and go. No extra steps, no waiting for dry ingredients to dissolve. That rich vanilla extract? It’s the secret that makes every bite smell like a bakery.
- Chewy Magic: The brown sugar’s caramel depth paired with melted chocolate chunks? That’s the good stuff. No baking soda means the centers stay soft and gooey, while the edges hold just enough structure—like a hug in cookie form.
- Budget Booster: Butter and sugar stretch far here. A single batch makes 24 cookies, and they disappear fast. Honestly, I’ve made these for potlucks, teacher gifts, and even my book club—everyone asks for the recipe, but I keep it close.
Step-by-step instructions for brown butter chocolate chip cookies
Here's how to create cookies with rich brown butter flavor and perfect chewiness—no baking soda needed.
Brown the Butter for Maximum Flavor
Melt the 1 cup unsalted butter in a light-colored saucepan over medium heat. Watch carefully as it foams and bubbles—when it turns golden brown with nutty aroma and small brown flecks, remove from heat immediately. Let it cool for 5 minutes, then whisk until smooth. This browning step creates that irresistible caramelized depth that sets these cookies apart.
Don't rush this process—the butter should smell like toasted nuts, not burnt. If it gets too dark, you'll taste bitterness. The cooled butter will be slightly thickened, which helps create the signature chewy texture. I like to work quickly here so the butter doesn't cool completely before we use it in the next step.
Cream the Brown Butter with Sugars
In a stand mixer fitted with the paddle attachment, beat the cooled brown butter with the 0.5 cup granulated sugar and 1 cup light brown sugar on medium speed for 3-4 minutes. You're looking for a light, fluffy texture that nearly doubles in volume. The butter should be pale and airy—this incorporates air that will create those beautiful crackly tops.
I press down on the paddle occasionally to ensure everything gets fully incorporated. The light brown sugar adds moisture and chewiness, while the granulated sugar helps create crisp edges. Don't skip this creaming step—it's what gives these cookies their signature texture. You'll know it's ready when the mixture looks like pale, fluffy whipped cream.
Add Eggs and Vanilla
Add the 2 whole large eggs one at a time, mixing on low speed for 30 seconds after each addition until fully incorporated. Then add the 2 teaspoons vanilla extract and mix for another 10 seconds. The mixture might look slightly curdled at first, but don't worry—it will come together when we add the dry ingredients.
I always use room temperature eggs for this recipe. They mix more smoothly and create a better texture. The vanilla extract should be pure, not imitation—you can really taste the difference in simple recipes like this. If you're using vanilla beans, scrape the seeds directly into the mixture for extra flavor depth.
Combine Dry Ingredients and Chocolate
In a separate bowl, whisk together the 2.5 cups all-purpose flour, 2 tablespoons cornstarch, 1 teaspoon baking powder, and 1 teaspoon salt. Add this dry mixture to the wet ingredients and mix on low speed for 30-45 seconds until just combined. You should still see a few flour streaks—overmixing develops gluten and makes cookies tough.
Remove the bowl from the mixer and fold in the 2 cups chocolate chips by hand using a silicone spatula. Make sure they're evenly distributed throughout the dough. I like to use a mix of semi-sweet and dark chocolate chips for depth of flavor. The cornstarch is what gives these cookies their signature chewy texture without baking soda—it creates a tender crumb while maintaining structure.
Chill and Shape the Dough
Cover the bowl with plastic wrap and refrigerate for at least 30 minutes (I prefer 1 hour or even overnight). Chilling solidifies the butter, which prevents the cookies from spreading too thin in the oven. It also allows the flour to fully hydrate, creating better texture. Cold dough also means the cookies hold their shape better when they hit the hot oven.
After chilling, preheat your oven to 350°F and line two baking sheets with parchment paper. Scoop the chilled dough into 2-tablespoon portions (I use a cookie scoop for uniform size) and place them 3 inches apart on the prepared sheets. Sprinkle each cookie with a pinch of the 1 tablespoon flaky sea salt before baking for that perfect salty-sweet contrast.
Bake to Golden Perfection
Bake for 11-13 minutes until the edges are golden brown but the centers still look slightly underdone. They'll continue cooking on the hot pan after you remove them from the oven. Let them cool on the baking sheet for 5 minutes before transferring to a wire rack. The cookies should be soft in the center with crisp edges and that signature chewy texture throughout.
Real talk: the first time I made these, I overbaked them and they were tough. Now I set a timer and watch for the edges to turn golden brown—that's your signal. Enjoy them warm for the ultimate experience, with a glass of cold milk. These cookies keep well in an airtight container for up to 5 days, though they rarely last that long in my house!
Pro Tips For Making Chewy Chocolate Chip Cookie Recipe Without Baking Soda
- Cream Butter Slowly: I learned this the hard way—whipping cold butter and sugar at high speed just traps air, making cookies spread too much. Let the butter sit at room temp for 20 minutes first, then mix on medium-low until the texture turns uniformly fluffy (about 3-4 minutes). That’s the sweet spot for chew without flat spots.
- Pack Brown Sugar: Brown sugar isn’t just sugar—it’s sugar + molasses, and packing it makes a real difference. Use a glass to press it firmly into the measuring cup (tap the counter to settle it). Without baking soda, that extra moisture and density keeps cookies thick and fudgy, not crisp.
- Underbake Slightly: The edges will look set when they’re not. Pull cookies out when the centers are just soft (they’ll firm up as they cool). For a 350°F oven, that’s usually 10-12 minutes—less than most recipes say. Overbaking turns chewy cookies into sad, dry crackers.
- Chill Dough Hard: Skip this, and your cookies will spread into pancakes. Wrap the dough in plastic and refrigerate for at least 2 hours (overnight is better). The cold butter solidifies, preventing excessive spreading and giving you that perfect thick, gooey center. Yes, even if you’re impatient like me.
Common mistakes when making this recipe
Overmixing the Dough
I've made this mistake more times than I'd like to admit—overmixing the dough turns your perfect chewy cookies into tough, cakey disappointments. Once you've added the dry ingredients, stop mixing as soon as you see just a few flour streaks remaining.
Overmixing develops gluten, which creates a dense, rubbery texture instead of that tender, melt-in-your-mouth chew we're after. I now set a timer for 30-45 seconds maximum when mixing with the stand mixer. 💡
Skipping the Chill
One of the most common mistakes is skipping the 30-minute chill (or worse, using warm dough). This is where the magic happens—the butter needs time to solidify so your cookies hold their shape instead of spreading into thin, crispy pancakes.
I've learned the hard way that cold dough = perfect cookies. If you're in a hurry, at least pop the dough in the fridge for 15 minutes—it makes a noticeable difference.
Using Wrong Chocolate
Not all chocolate chips are created equal. Pre-shredded chocolate (the kind in bags) contains anti-caking agents that prevent proper melting, resulting in dry, grainy pockets in your cookies. Always use high-quality chocolate chips—Ghirardelli semi-sweet or Valrhona are my top picks.
For even better results, chop your own chocolate bars. I've also seen people use white chocolate chips, which melt differently and can make the cookies too soft. Stick with semi-sweet for that perfect balance.
Overbaking for "Done" Look
The biggest rookie mistake is baking until the cookies look completely done. These should have golden edges but still look slightly underdone in the center—they'll firm up as they cool. I used to pull them out when they looked perfectly browned, only to end up with tough cookies.
Now I set a timer for 11-13 minutes and check at 11 minutes. The centers should be soft when pressed gently. They'll continue setting on the baking sheet after removal.
Ignoring Butter Temperature
Using cold butter straight from the fridge or letting it get too warm before mixing creates texture problems. Cold butter creates dense cookies that don't spread properly, while butter that's too warm makes them spread too thin.
The butter should be cool enough to firm up slightly when chilled but still soft enough to cream properly. I let my browned butter cool completely before mixing, then refrigerate the dough to maintain that perfect temperature.
Wrong Baking Powder
Not all baking powders are created equal, and using the wrong type can ruin your cookies. Aluminum-containing baking powders create a different texture and can make your cookies taste metallic. Always use aluminum-free baking powder for the best results.
I keep a small container of Bob's Red Mill baking powder specifically for baking, and I test it regularly by mixing with water—it should bubble vigorously. If it doesn't, it's time for a fresh container. 🧂
Nutrition facts
Frequently asked questions
Why does this recipe use baking powder instead of baking soda?
Baking powder provides gentle lift without the alkaline taste that baking soda can introduce. The combination of baking powder and cornstarch creates the perfect chewy texture while maintaining structure. This method also prevents those cookies from becoming too cakey or developing a metallic aftertaste.
Can I make these cookies without brown butter?
Yes! For similar flavor, melt regular butter and add 1 tablespoon extra brown sugar per 1 cup butter. However, brown butter adds that nutty depth that makes these cookies truly special. If you're short on time, use high-quality melted butter and don't skip the browning step entirely.
How do I prevent my cookies from spreading too much?
Always chill the dough for at least 30 minutes before baking. Cold butter solidifies, helping cookies hold their shape. Scoop dough balls with a 2-tablespoon measure and place them 3 inches apart on the baking sheet. Avoid overbaking—pull them when edges are golden but centers still look soft.
What's the best way to store these cookies?
Store in an airtight container at room temperature for up to 5 days. For longer storage, freeze portions for 3 months. To revive texture, warm in a 350°F oven for 5 minutes before serving. The key is keeping them protected from air and moisture to maintain chewiness.
Can I add other mix-ins like nuts or oats?
Yes! Fold in 1 cup chopped walnuts or pecans for crunch, or ½ cup old-fashioned oats for texture. Just reduce chocolate chips by the same amount to maintain balance. For best results, toast nuts first to enhance flavor. Keep total mix-ins under 1.5 cups to preserve the signature chewy texture.