
Desserts
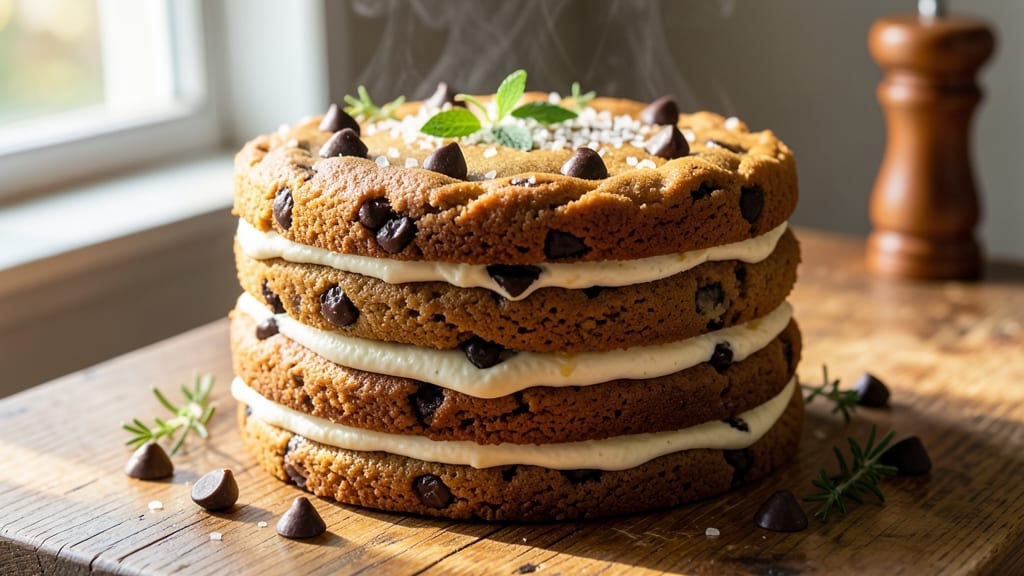
This chewy chocolate chip cookie cake recipe delivers the perfect balance of crispy edges and melt-in-your-mouth centers, with layers of gooey chocolate chips throughout. The secret lies in a precise blend of brown sugar, corn syrup, and underbaking—techniques that transform ordinary cookies into a decadent cake. After years of perfecting my cookie cake formula, I’ve finally cracked the code for that signature chewy texture that keeps everyone reaching for seconds.
The foundation starts with a rich, buttery dough that incorporates both brown and white sugar for depth, while corn syrup ensures that signature chewiness. Baking in layers creates a towering cake with crispy edges and a tender, moist interior, all studded with pockets of melted chocolate.
The key is baking just until the edges are set—underbaking ensures the cake stays soft and chewy rather than dry.
What you’ll end up with is a showstopping dessert that’s equal parts impressive and comforting—golden layers with crispy tops, tender centers, and chocolate chips that stay gooey even after cooling. It’s the kind of cake that disappears quickly, whether served at a party or as a weekend treat.
The best part? It’s easier to make than it looks, with foolproof techniques that guarantee success every time.
Top with a dusting of powdered sugar or a drizzle of melted chocolate for extra flair, and serve warm with a scoop of vanilla ice cream. This recipe is designed to impress without being intimidating—perfect for both beginners and seasoned bakers. Let’s get baking!
Ingredients for chewy chocolate chip cookie cake
Twelve ingredients, towering layers of chewy magic—this cookie cake is pure indulgence.
| Ingredient | Amount | Notes |
|---|---|---|
| Unsalted Butter 🧈 | 1 ½ cups | Softened to room temperature |
| Light Brown Sugar 🍚 | 1 ½ cups | Packed firmly into measuring cup |
| Granulated White Sugar 🍚 | ½ cup | For balanced sweetness |
| Corn Syrup 🍯 | ½ cup | For signature chewiness |
| Large Eggs 🥚 | 2 whole | Room temperature for even mixing |
| Vanilla Extract 🌿 | 1 tbsp | Pure extract preferred |
| All-Purpose Flour 🌾 | 3 ½ cups | Sifted for light texture |
| Baking Soda 🧂 | ½ tsp | For lift and crispiness |
| Salt 🧂 | 1 tsp | Fine sea salt preferred |
| Chocolate Chips 🍫 | 3 cups | Semi-sweet, not milk chocolate |
| Powdered Sugar 🍚 | ½ cup | For dusting top layers |
| Dark Chocolate Bars 🍫 | 4 oz | For melting and drizzling |
The butter needs to be soft but not melted—room temperature is key. Land O’Lakes unsalted is my go-to, but any good brand works. Brown sugar should be packed firmly—tap the measuring cup to settle it. Corn syrup is non-negotiable here; it’s what gives this cake that signature chewiness. For the chocolate chips, Ghirardelli semi-sweet melts perfectly, but any quality brand will do. Pro tip: keep the chips chilled until you’re ready to fold them in—prevents premature melting.
No corn syrup? Honey or maple syrup at half the amount works in a pinch, though the texture will be slightly different. Running out of vanilla? Almond extract at half the amount adds depth. For the chocolate, 70% dark chocolate bars melt beautifully for drizzling—just chop them into small pieces first. The baking soda and salt are simple but crucial; don’t skip them. And if you’re feeling fancy, swap half the chocolate chips for white chocolate chips or chopped nuts for extra crunch.
This cake keeps beautifully—3 days at room temperature covered tightly, or 1 week refrigerated. For longer storage, wrap tightly and freeze for up to 3 months. The best part? It actually tastes better the next day as the flavors meld. Serve warm with a scoop of vanilla ice cream, or dust with powdered sugar and drizzle with melted chocolate right before serving. Leftovers? Toast slices in the oven for 5 minutes to revive the crispy edges.
Why You'll Love This Recipe
- No Weird Ingredients: I swear by this combo—rich brown sugar, creamy butter, and just a splash of corn syrup for that perfect chew. No weird substitutions, no baking powder drama. It’s the classic you already love, but baked into a cake that’s basically dessert for breakfast.
- One-Bowl Wonder: Mix, scoop, bake. That’s it. No food processor, no folding in flour until your arms ache. The dough comes together faster than my coffee brews, and the cake stays moist for days—no dry crumbs in sight.
- Dessert That Works: Bring it to potlucks, slice it for lunchboxes, or freeze slices for lazy nights. It’s the kind of treat that doesn’t scream “special occasion”—just pure, gooey chocolatey joy that fits anywhere.
- Budget-Friendly Indulgence: A single batch uses pantry staples (hello, butter and sugar) and stretches to feed a crowd. Leftovers? Even better. I’ve had this cake last five days, and it’s still the star of my snack rotation—no guilt, all flavor.
Step-by-step instructions for chewy chocolate chip cookie cake
Here's how to build layers of cookie cake magic with perfect chewiness and melty chocolate.
Cream Butter and Sugars to Fluffy Perfection
In a stand mixer fitted with the paddle attachment, beat the 1.5 cups unsalted butter until completely smooth and creamy, about 2 minutes. This ensures no lumps remain. Gradually add the 1.5 cups light brown sugar and 0.5 cup granulated white sugar, mixing on medium speed for 3-4 minutes until light and fluffy.
The mixture should nearly double in volume and look pale and airy. This step is crucial for creating that signature chewy texture. I press down on the butter mixture with a spatula to check for readiness—it should spring back with a slight indentation. Don't rush this; under-creaming leads to dense, cakey layers instead of chewy cookies.
Incorporate Wet Ingredients and Fold in Dry Components
Add the 0.5 cup corn syrup and mix for 30 seconds to combine completely. This syrup is what gives our cookie cake that signature chewiness and moisture. In a separate bowl, whisk together the 3.5 cups all-purpose flour, 0.5 teaspoon baking soda, and 1 teaspoon salt. With the mixer on low speed, gradually add the dry ingredients to the wet mixture.
Mix just until combined—you should still see some flour streaks. Overmixing develops gluten, which makes the cake tough instead of chewy. Remove the bowl from the mixer and gently fold in the 3 cups chocolate chips using a silicone spatula. Make sure they're evenly distributed throughout the dough. This is where the magic happens—each bite should promise pockets of melty chocolate goodness.
Prepare the Cake Pans and Assemble Layers
Preheat your oven to 350°F. Grease three 9-inch round cake pans and line the bottoms with parchment paper. Divide the dough evenly among the three pans, spreading each layer to the edges for even baking. The dough will be thick, but press it down gently to ensure even cooking.
Bake for 12-14 minutes until the edges are golden brown and a toothpick inserted in the center comes out with a few moist crumbs (not wet batter). The centers should still look slightly underdone—they'll firm up as they cool. Let the layers cool in the pans for 5 minutes before transferring to a wire rack to cool completely.
Create the Chocolate Drizzle and Assemble
While the layers cool, melt the 4 ounces dark chocolate bars in a microwave-safe bowl in 30-second intervals, stirring between each interval until completely smooth. Let it cool slightly until it's thick enough to drizzle but still pourable. In a small bowl, whisk together 0.5 cup powdered sugar with 1 tablespoon vanilla extract until smooth.
Once the layers are completely cool, place one layer on a cake stand or plate. Spread 2 tablespoons of the chocolate drizzle evenly over the top, then dollop 2 tablespoons of the vanilla powdered sugar mixture and spread lightly. Repeat with the remaining layers, finishing with the top layer. Drizzle the remaining chocolate over the entire cake, allowing it to create a beautiful marbled effect. Let the chocolate set for 15 minutes before slicing.
Chill and Serve for Maximum Gooeyness
Refrigerate the assembled cake for at least 1 hour before serving. This chilling time allows the chocolate to fully set and the layers to meld together perfectly. When you're ready to serve, slice into generous pieces—each bite should deliver that perfect balance of crispy edges, chewy centers, and melty chocolate pockets.
The cake will keep well in the refrigerator for up to 5 days, though I doubt it will last that long with its irresistible aroma and texture. For an extra-special touch, dust the top with additional powdered sugar right before serving. This cookie cake is the ultimate dessert for any occasion—birthdays, holidays, or just because you deserve something amazing!
Pro Tips For Making Chewy Chocolate Chip Cookie Cake
- Cream Butter Slowly: I learned this the hard way—dumping cold butter into warm sugar makes a greasy mess. Instead, cut the butter into small cubes and mix it into the sugar with a wooden spoon first, letting it melt gradually. The dough will be smoother and less likely to seize up when you add the wet ingredients.
- Swirl in Chocolate: Don’t just dump chocolate chips into the dough—they’ll clump and burn. Fold in half the chips by hand, then use a rubber spatula to swirl the rest in. Press a few larger chunks into the top before baking for that bakery-style look.
- Bake Until Golden: Underbaked cookie cake = gummy. Overbaked = dry. Pull it out when the edges are golden but the center still looks slightly soft (a toothpick should come out with some wet crumbs, not raw dough). Let it cool 10 minutes before slicing—yes, even if you’re impatient like me.
- Chill the Dough: Skip this, and your cake will spread into a sad, flat pancake. Divide the dough, flatten each half into a disk, wrap in plastic, and refrigerate for at least 2 hours. The cold butter won’t melt too fast, and your layers will hold their shape. (Pro move: Freeze them overnight if you’re baking ahead.)
Troubleshooting your chewy chocolate chip cookie cake
Underbaked Layers
If your cookie cake comes out too soft or cakey rather than chewy, you likely overbaked it. The key is stopping when edges are golden but centers still look slightly underdone—this ensures that signature chewiness.
Aim for a toothpick with moist crumbs (not wet batter). For extra insurance, set your oven timer for 12 minutes and check early—every oven varies. 🌡️
Dry Texture
Dry cookie cake usually means too much flour was used or the butter wasn't properly creamed. Weigh your ingredients for precision—3.5 cups flour should be 170g (not scooped).
Also, ensure your butter is room temperature but not melted. If your cake turns out dry, try adding 1 tablespoon milk to the dough next time to restore moisture.
Chocolate Chips Stay Hard
Chilled chocolate chips won't melt properly during baking. Let them sit at room temperature for 15-20 minutes before folding into dough. For extra insurance, microwave them for 10 seconds to soften slightly—just enough to create pockets of gooey goodness without fully melting.
Store chocolate chips in the fridge between uses to maintain firmness. 🍫
Cracked or Soggy Layers
Sudden temperature changes cause cracks, while soggy layers often mean the cake cooled too quickly. Let your layers cool in pans for 5 minutes before transferring to a wire rack. For assembly, work in a cool kitchen—68°F or below prevents the chocolate from melting too fast.
If cracks appear, simply cover them with extra chocolate drizzle for a seamless finish.
Flat Layers
Flat layers usually mean the dough wasn't spread evenly or baked long enough. Press the dough firmly to the edges of your 9-inch pans before baking. If your layers are too thin, try pressing the dough slightly thicker—about ½ inch in the center.
For extra height, chill the dough for 30 minutes before baking to help it rise better in the oven.
Burnt Edges
Burnt edges happen when your oven runs hot. Rotate your pans halfway through baking and avoid opening the oven door during the 12-14 minute cook time. If your oven tends to run hot, reduce the temperature to 325°F and bake for 15-16 minutes.
A dark-colored pan also heats faster—use light-colored pans for even baking. 🔥
Nutrition facts
Frequently asked questions
Why does this recipe use corn syrup?
Corn syrup is the secret to that signature chewy texture! It adds moisture and prevents the cookie cake from drying out too quickly. The syrup helps create a tender crumb while maintaining that perfect balance between crispy edges and gooey centers. Without it, you might end up with a cake that's more cakey than chewy.
Can I make this cookie cake in a different shape?
While this recipe calls for three 9-inch round layers, you can easily adapt it for other shapes. Try using a 9x13-inch pan for a single sheet cake layer or divide the dough into cupcake liners for individual servings. Just reduce baking time to 10-12 minutes for cupcakes to prevent overbaking.
How do I prevent the chocolate chips from sinking to the bottom?
Fold the chocolate chips in gently at the very end, using a silicone spatula to distribute them evenly. For extra insurance, chill the dough for 30 minutes before baking—this helps the chips stay suspended. If you notice sinking after baking, simply add more melted chocolate drizzle on top to cover any gaps.
Can I substitute white chocolate chips?
Yes, but use them in moderation—white chocolate melts differently than semi-sweet. Replace 1 cup of semi-sweet chips with white chocolate for a sweeter, creamier flavor. For best results, fold them in last and avoid overmixing. The white chocolate will create beautiful swirls when melted, adding visual appeal to each slice.
How do I make this cake gluten-free?
Replace the all-purpose flour with a 1:1 gluten-free baking flour blend (like Bob's Red Mill). Add ½ teaspoon xanthan gum to help bind the layers. You may also need to increase the baking time by 1-2 minutes since gluten-free batters often bake faster. Test with a toothpick to ensure doneness.