
Desserts
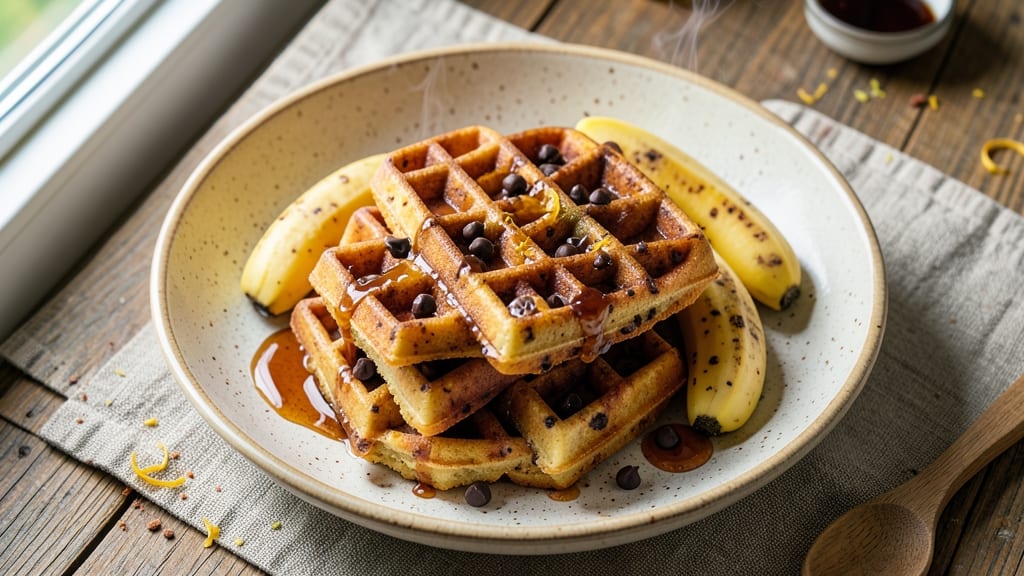
This banana chocolate chip waffle recipe delivers golden crisp edges and gooey chocolate melts in every bite—perfect for weekend breakfasts or dessert cravings. The secret lies in blending ripe bananas with buttermilk for a tender, fluffy texture, while baking at the right temperature ensures those coveted crispy edges without burning.
I developed this recipe after years of testing, and it consistently produces waffles that taste like a bakery treat but are foolproof at home.
The batter comes together in just 5 minutes with simple pantry staples: ripe bananas, eggs, flour, and of course, chocolate chips. A splash of vanilla and pinch of cinnamon elevate the flavors, while baking powder ensures light, airy waffles.
The key to success? Don’t overmix the batter—just stir until combined to avoid dense waffles. This recipe makes 8 waffles, perfect for sharing or freezing for quick breakfasts later in the week.
What you’ll end up with is a stack of warm, crispy-edged waffles with pockets of melted chocolate in every bite—ideal for topping with whipped cream, maple syrup, or a sprinkle of powdered sugar.
The bananas add natural sweetness, while the chocolate chips provide rich, gooey contrast. These waffles are kid-friendly, brunch-worthy, and equally delicious for dessert.
For a dietary twist, swap the butter for coconut oil and use flax eggs if needed—though the original version delivers the best texture and flavor. Whether you’re feeding a crowd or treating yourself, this recipe is your go-to for restaurant-quality waffles at home.
Ingredients for banana chocolate chip waffle
Golden edges, gooey melts—just 12 ingredients transform your weekend mornings.
| Ingredient | Amount | Notes |
|---|---|---|
| Ripe Bananas 🍌 | 2 large | Mashed for natural sweetness |
| All-Purpose Flour 🌾 | 1 ½ cups | Sifted for light texture |
| Large Eggs 🥚 | 2 whole | Room temperature preferred |
| Buttermilk 🥛 | 1 cup | Full-fat for richness |
| Unsalted Butter 🧈 | ½ cup | Melted, cooled slightly |
| Vanilla Extract 🍯 | 1 tbsp | Pure extract preferred |
| Granulated Sugar 🍚 | ¼ cup | Light brown sugar optional |
| Baking Powder 🧪 | 1 tsp | Aluminum-free preferred |
| Ground Cinnamon 🌿 | ½ tsp | Freshly ground preferred |
| Salt 🧂 | ¼ tsp | Fine sea salt |
| Semisweet Chocolate Chips 🍫 | 1 cup | Enjoy Life brand for allergies |
| Vegetable Oil 🫒 | 1 tbsp | For greasing waffle iron |
Ripe bananas are non-negotiable here—they add natural sweetness and moisture that store-bought mix can't match. Look for bananas with brown speckles (not too mushy) at Whole Foods or your local market. The chocolate chips? Enjoy Life brand is my go-to for allergy-friendly baking, but any quality chips work. For the flour, King Arthur brand is my secret weapon—it's finely milled for perfect texture. The buttermilk should be full-fat; culture it yourself with milk and vinegar if you're feeling fancy, but store-bought works fine.
No buttermilk? Substitute with 1 cup milk + 1 tbsp vinegar or lemon juice, let it sit 5 minutes. Short on chocolate chips? Use chopped dark chocolate or even white chocolate—just adjust baking time slightly. The vanilla extract must be pure; imitation extracts won't cut it here. For a dietary twist, swap the butter for coconut oil and use flax eggs (1 tbsp ground flax + 3 tbsp water per egg). The cinnamon should be freshly ground if possible—pre-ground loses potency fast. And if you're worried about the waffles being too sweet, reduce the sugar to 1/4 cup or add extra cinnamon for warmth.
This batter keeps for 24 hours in the fridge—just whisk before using. For make-ahead magic, bake all 8 waffles and freeze between parchment paper. Reheat in a toaster or air fryer for crispy edges every time. The chocolate chips will melt beautifully during baking, but if you're worried about them sinking, fold them in gently at the very end. Store leftovers in an airtight container for 3 days or freeze for up to 3 months. Pro tip: Brush warm waffles with melted butter before serving—game-changer for flavor.
Why You'll Love This Recipe
- No Mashing Needed: That’s right—just mash the bananas right in the bowl with the dry ingredients. No strainer, no extra prep, just fold in the chocolate chips and go. Honestly, the first time I skipped the strainer, I worried about lumps, but now? I don’t even own a food processor for this.
- Caramelized Crunch Magic: The buttermilk keeps it tender, but the butter—oh, the butter—gives those edges a golden, crispy snap while the inside stays soft. Add the chocolate chips last so they melt just enough to create pockets of gooey goodness. (Yes, even on a Tuesday night.)
- Breakfast or Dessert?: Serve them warm with peanut butter for a protein-packed breakfast, or drizzle with honey and a sprinkle of sea salt for a dessert that feels indulgent. I’ve even frozen extras to toss in lunchboxes—kids devour them cold with a smear of Nutella.
- Pantry Staples Only: You’re using ingredients you already have: flour, eggs, butter, and bananas that might otherwise go to waste. Budget-friendly? Absolutely. Time-saving? Even better. Between us, this recipe saved me $20 last month by keeping me from buying overpriced pastries.
Step-by-step instructions for banana chocolate chip waffles
Here's how to create waffles with perfectly crisp edges and gooey chocolate melts every time.
Mash the Bananas and Mix Wet Ingredients
Start by mashing the 2 large ripe bananas in a medium bowl until completely smooth—no lumps allowed. This natural sweetness replaces refined sugar while keeping the waffles moist. In a separate large bowl, combine the mashed bananas with the 1 cup buttermilk, 0.5 cup melted unsalted butter (cooled slightly), 1 tbsp vanilla extract, and 0.25 cup granulated sugar. Whisk vigorously for 2 minutes until fully blended. The mixture should be thick but pourable.
Here's the thing—ripe bananas are sweeter than you think. Taste the mixture now. If it needs more sweetness, add 1-2 teaspoons of sugar (but trust me, it's usually perfect). The buttermilk adds richness and helps create those tender, fluffy pockets in the waffles. Don't skip cooling the melted butter—hot butter can cook the eggs prematurely and make your batter gummy.
Combine Dry Ingredients and Fold in Chocolate
In a separate bowl, sift together the 1.5 cups all-purpose flour, 1 tsp baking powder, 0.5 tsp ground cinnamon, and 0.25 tsp salt. I always sift the dry ingredients first—this prevents lumps and ensures even distribution of leavening. Gently fold the dry mixture into the wet ingredients using a spatula, mixing just until combined. Overmixing develops gluten, which makes waffles tough instead of light and crispy.
Now fold in the 1 cup semisweet chocolate chips by hand. I like to distribute them evenly throughout the batter so every bite has that perfect chocolate surprise. Don't worry if some chips sink to the bottom—they'll still melt beautifully in the waffle iron. Give the batter one final stir to ensure everything is evenly incorporated. The batter should be thick but still able to flow smoothly when poured.
Preheat and Prepare the Waffle Iron
While you prepare the batter, preheat your waffle iron to 375°F—this is the magic temperature for achieving those golden crisp edges while keeping the interior tender. Lightly brush the plates with 1 tbsp vegetable oil using a paper towel, making sure to coat every nook and cranny. This prevents sticking and ensures your waffles release cleanly. I like to use vegetable oil because it has a high smoke point and doesn't impart any flavor.
Here's a pro tip: Place a small piece of parchment paper on the bottom plate before pouring the batter. This creates a non-stick barrier and makes flipping your waffles effortless. The parchment also helps you remove the waffle in one perfect piece when it's done. Once the iron is preheated and oiled, you're ready to cook—don't let it sit idle for too long or it'll burn the oil.
Cook the Waffles to Golden Perfection
Pour about ½ cup of batter onto the center of the preheated waffle iron, spreading it evenly to the edges. Close the lid and cook for 4-5 minutes until the waffle is golden brown and crisp around the edges. You'll know it's ready when you hear that satisfying sizzle and see steam rising from the sides. Don't be tempted to open the lid early—this releases steam and can make your waffles dense instead of crisp.
Use a thin spatula or the waffle iron's release handle to carefully remove the waffle. Place it on a wire rack to cool for 2-3 minutes—this prevents sogginess from steam. Repeat with the remaining batter, adding a little more oil between batches if needed. For best results, keep the cooked waffles warm in a 200°F oven while you finish the batch. This maintains their crisp texture until serving.
Serve Warm with Toppings
Serve the waffles immediately while they're still warm and crisp. The contrast between the crisp edges and the soft, banana-infused interior is what makes these waffles special. Top with additional semisweet chocolate chips, a drizzle of melted butter, or a dollop of whipped cream. I like to sprinkle extra cinnamon on top for a warm, aromatic finish that complements the chocolate perfectly.
These waffles are best enjoyed fresh, but if you need to reheat, pop them in a 350°F oven for 2-3 minutes to restore that crisp texture. The chocolate chips should be gooey but not melted into a puddle—this is the perfect balance of textures. Each bite delivers that sweet banana flavor, warm cinnamon notes, and rich chocolate melts that make these waffles unforgettable.
Pro Tips For Making Banana Chocolate Chip Waffle
- MASH THE BANANAS FIRST: I learned this the hard way—adding whole bananas to the batter leads to weird, chewy pockets. Smash them against the bowl’s side with a fork until it’s a smooth, thick purée. This makes the waffles fluffier and ensures every bite has that sweet, creamy banana flavor.
- USE ROOM-TEMP BUTTER: Cold butter from the fridge? Skip it. Let that unsalted butter sit out for 10-15 minutes before melting it into the batter. Soft butter blends in better and gives the waffles a richer, more even texture—no greasy surprises when you flip.
- WAIT FOR THE GOLDEN CRUST: The second the edges turn golden, that’s when you flip—no exceptions. I used to rush it, and the waffles ended up dense and undercooked inside. A crisp, golden-brown crust means the center’s cooked through too, and it’s the only way to avoid that sad, gummy middle.
- SWAP BUTTERMILK FOR YOGURT: Short on buttermilk? Plain Greek yogurt works just as well—same tang, same moisture. Mix ¾ cup yogurt with ¼ cup water to mimic the thinness, then let it sit for 5 minutes before adding to the batter. Your waffles will still be light and tender.
Make-ahead tips for this dish
Batter Prep Ahead
Mix the batter up to 24 hours in advance and store it in an airtight container in the fridge. The flavors meld beautifully overnight, and the buttermilk has time to fully integrate with the bananas.
When ready to cook, give it a quick whisk to redistribute the chocolate chips and restore the thick consistency. This is my go-to strategy for lazy weekend mornings—just pull the batter from the fridge, preheat the iron, and you're ready to go. 🌟
Freeze Cooked Waffles
Bake all 8 waffles, then let them cool completely before stacking with parchment paper between each layer. Place the stack in a ziplock freezer bag and freeze for up to 3 months.
To serve, thaw at room temperature for 10 minutes, then reheat in a toaster or air fryer at 375°F for 2-3 minutes until crisp again. The chocolate chips stay gooey even after freezing—this is a game-changer for busy weekdays.
Batch Baking Tips
For large gatherings, bake the waffles in batches and keep them warm in a 200°F oven on a wire rack. This prevents sogginess and maintains crisp edges. I like to brush each waffle with melted butter right after baking—this adds extra richness and makes them irresistible.
Store any leftovers in an airtight container at room temperature for 2 days, or refrigerate for 4 days if you prefer them colder.
Make-Ahead Toppings
Prep toppings the night before to save time. Melt chocolate chips with 1 tbsp coconut oil for a quick chocolate sauce, or whip up a batch of vanilla whipped cream. Store both in airtight containers in the fridge.
In the morning, simply warm the waffles and assemble with your pre-made toppings. This is especially helpful if you're hosting brunch—everything comes together in minutes. 💫
Reheating Perfection
For the best results, reheat waffles in a toaster or air fryer rather than the microwave. A toaster at medium-high heat for 2-3 minutes restores crisp edges, while an air fryer at 350°F for 3 minutes gives a crispier texture.
Avoid microwaving—it turns waffles soggy and ruins the crispy edges. If reheating from frozen, add an extra 1 minute to ensure even cooking.
Portion Control
Divide the batter into 8 equal portions (about ½ cup each) using a kitchen scale or measuring cups. This ensures consistent waffle sizes and prevents overcrowding in your waffle iron. Label portions with parchment paper cutouts if freezing—it saves time when reheating later.
For a fun twist, use silicone waffle molds to create fun shapes like hearts or stars, perfect for celebrations. 🍓
Nutrition facts
Frequently asked questions
Why do my banana waffles turn out dense instead of crispy?
Overmixing the batter develops gluten, which makes waffles tough. Stir just until combined—about 10-12 strokes—and avoid using a stand mixer. Also, make sure your waffle iron is preheated to 375°F and don't open it too soon—steam needs time to create those crisp edges.
Can I make these waffles without eggs?
Yes! Replace the 2 eggs with 2 flax eggs (2 tbsp ground flaxseed + 6 tbsp water, let sit 5 minutes) or ½ cup applesauce. The texture will be slightly denser but still delicious. For best results, add ½ tsp baking soda to help with rise.
How do I prevent chocolate chips from sinking to the bottom?
Fold them in gently at the very end when the batter is thickest. For extra insurance, chill the batter for 15 minutes before cooking—this helps the chocolate stay suspended. If they still sink, use slightly larger chips (½-inch) for better distribution.
What's the best way to store leftover waffles?
Cool completely, then stack with parchment paper between each. Store in an airtight container at room temperature for 2 days or freeze for 3 months. To reheat, use a toaster or air fryer at 375°F for 2-3 minutes—microwaving makes them soggy.
Can I use regular chocolate bars instead of chips?
Chop 1.5 oz (about 1 bar) of dark or milk chocolate into ½-inch pieces for even melting. For extra gooeyness, use chocolate with 30-50% cocoa. Just reduce baking time by 30 seconds since chocolate melts faster than chips.